3 minutes
Let’s build a Static Website using Hugo!
![]()
intro
In this post, we will go through the steps to create a static Website for Personal Blogs
The solution will be using the following:
- A Github Repo
- Where we will be storing our Website code
- Hugo
- It will be used to build our static Website
- Netlify
- Provides inegration with GitHub and automation to deploy our Website
- Comes with free integrated SSL/TLS Let’s Encrypt certificates
For the purpuses of this post, I will be using Ubuntu Linux as my Dev environment
This is a great introduction for all of you out there new to Devops and to using Git, especially SysAdmins moving to the Cloud/Devopsish side of things!
Let’s see how it works
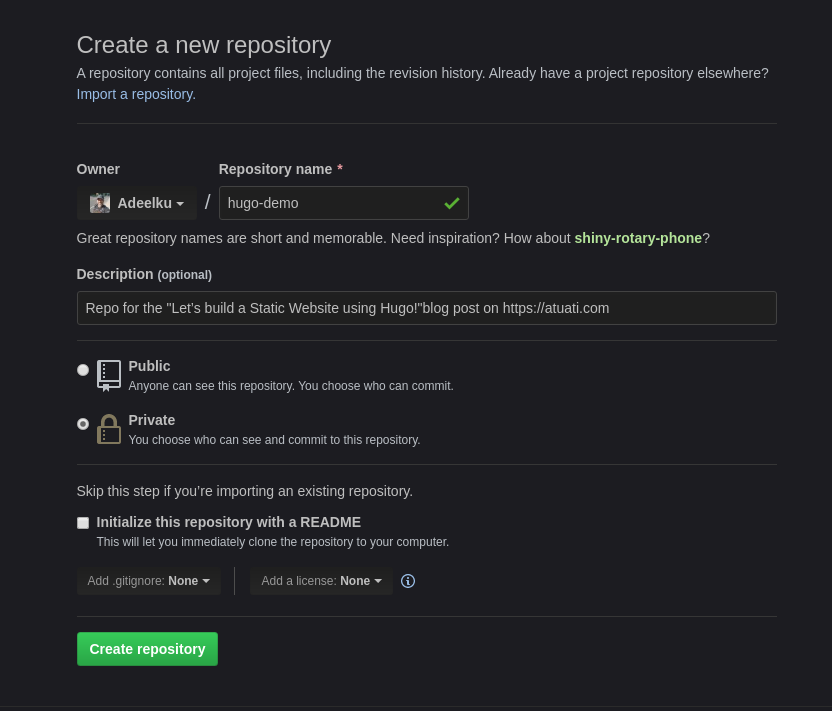
Create a Private Github Repo
Logon to your Github or create a new account, and create a private Repo
Install Hugo
Hugo releases pages can be found here
Documentation on installing Hugo on different Operating Systems can be found here
We will install the latest version 0.60.1 as of the day of writing this post.
cd ~/Downloads
wget https://github.com/gohugoio/hugo/releases/download/v0.60.1/hugo_0.60.1_Linux-64bit.deb
sudo dpkg -i hugo_0.60.1_Linux-64bit.deb
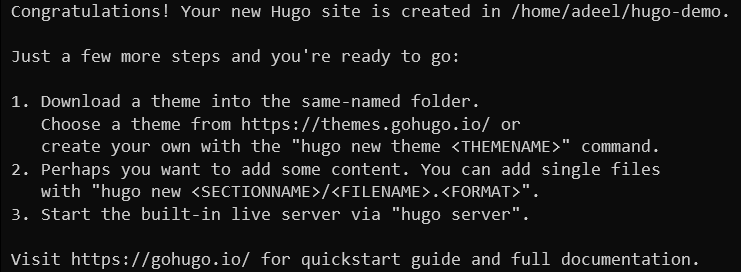
Create Hugo empty Website
Navigate to the location where you want to add the hugo-demo folder for the website
The following command creats the site
hugo new site hugo-demo
Intialise the local Git repo and push to GitHub
Make sure to use your own Repo URL :)
cd hugo-demo
echo "# hugo-demo" >> README.md
git init
git add --all
git commit -m "first commit"
git remote add origin https://github.com/Adeelku/hugo-demo.git
git push -u origin master
Add a template
Hugo has a huge library of templates available here
We will use, as an exemple Goa, a minimalist Theme https://github.com/shenoybr/hugo-goa
Download the repo (do not clone it) and unzip it to the themes folder within the freshly created Hugo site
unzip hugo-goa-master.zip -d ~/hugo-demo/themes/
Rename the folder:
mv themes/hugo-goa-master/ themes/hugo-goa/
update the content of the site
- Copy the configuration file from themes/hugo-goa-master/exampleSite/config.toml to the root folder of the site.
cp themes/hugo-goa-master/exampleSite/config.toml .
-
Edit the config.toml file to reflect your own information
-
Add a blog post
hugo new /blog/post1.md
- Add content to the Post
- Add an About page
hugo new /about/index.md
-
Add content to the About page
-
Test your newly created site
hugo server
Navigate to http://localhost:1313
Build the Website on Netlify
- Connect to https://netlify.com and create a new account or use an existing one
Configure DNS
- Go to Domains and follow the steps to add your own domain
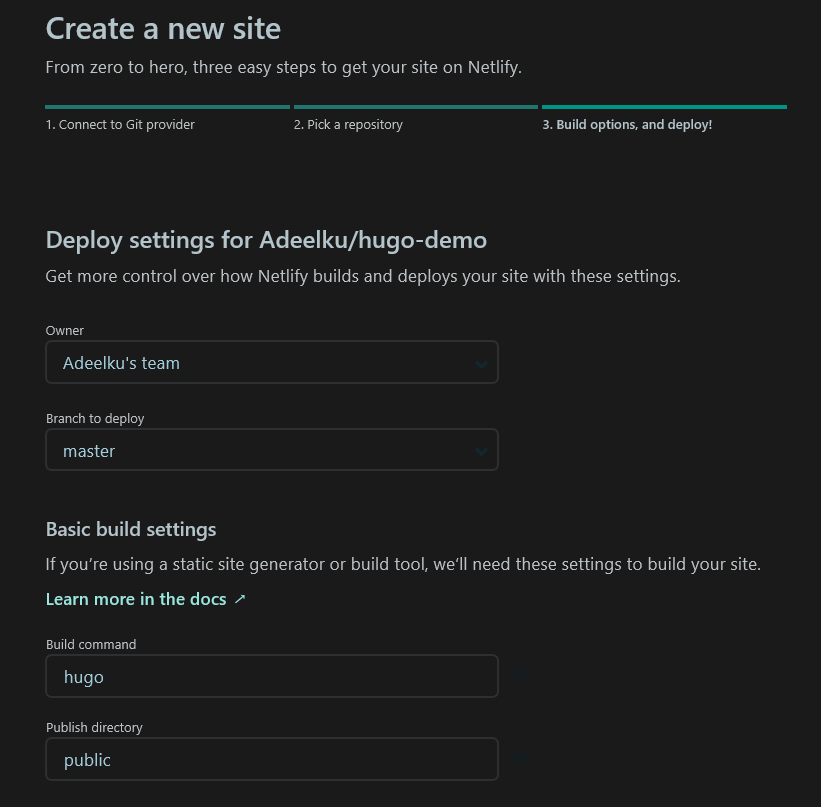
Create the site using CI (Continious Integration)
- Choose: New site from Git
This will enable Continious Inegration for the site

- Connect Netlify to your Git and add permissions to the repo
- Finish configuring the build
- Click on Deploy the site
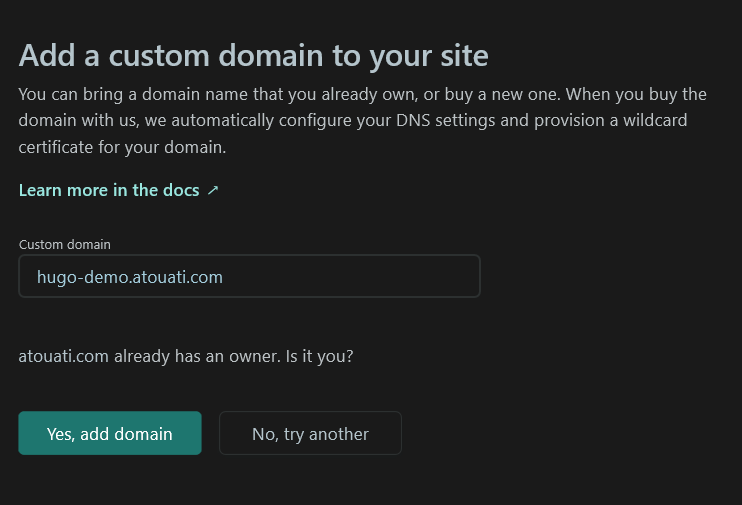
- Configure Custom Domain
Once the Build completes, select Custom Domain

Verify the Custom domain
Enable SSL using Let’s Encrypt
Et voilà :), the site is accessible using the custom domain

Automatic content update
Whenever you add content to the site via /blog/posts.md files, commiting your changes to GitHub will trigger CI to Netlify and the site will be rebuilt showing the latest updates